4 Easy Crochet Seaming Techniques [Video Tutorial]
")
Joining crochet squares, motifs, and panels is an important part of the finishing process. Seams can turn pieces of crochet fabric into blankets, sweaters, or anything else your heart desires. Bookmark this guide to 4 simple crochet seaming techniques for future use.
This post contains affiliate links that support the content on TLYCBlog.com. All opinions are my own. Find my Privacy & Disclosures Policy here.
CLICK HERE TO PIN THIS POST
Crochet seaming brings pieces together, but seams can also be decorative and worked into the visual design of a project. There are dozens of ways to join crochet fabric. I’m sharing 4 of my favorite methods here. Each one has its benefits and drawbacks. But I always find that no matter what seam I am going for, one of these four will fit the bill.
Regardless of the function your seams play, tension is the most important piece of the puzzle. Work your seams too tight and your crochet fabric will group and bunch. Work the seam too loose and your work will have gaps where the seams should be. Be mindful of your tension throughout the seam and don’t be afraid to unpick part of your seam and redo it to achieve a clean seam.
What You Will Learn
Many crochet projects from sweaters to blankets, amigurumi, and shawls will involve crochet seaming. This video will teach you 4 simple techniques that are easy for beginners to pick up on and use in their projects. Even as an experienced crocheter, I go back to these techniques again and again.
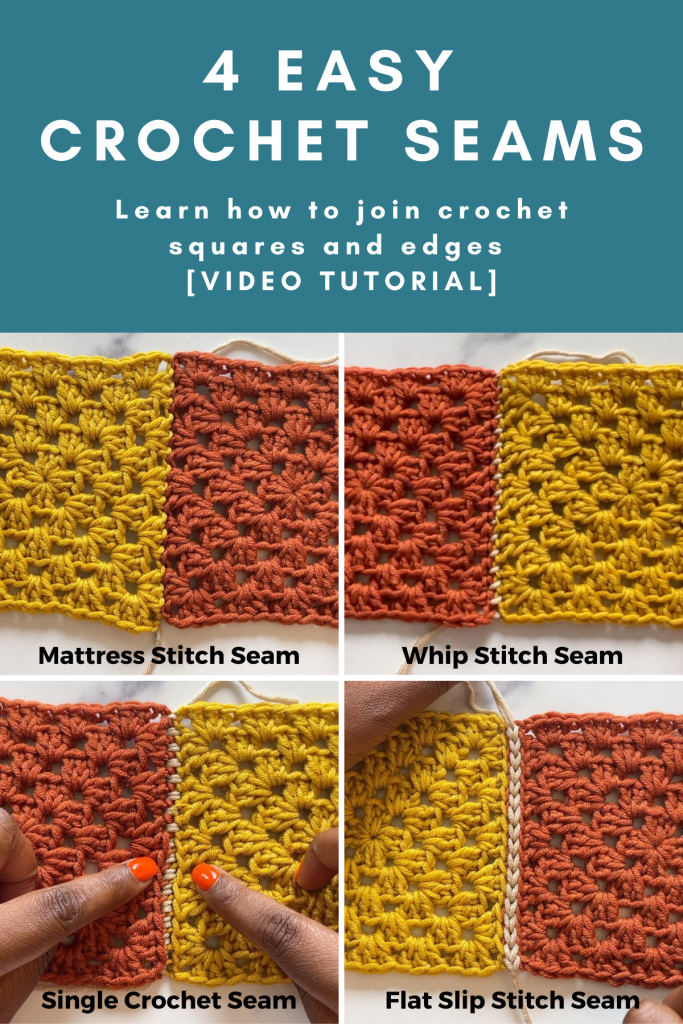
- Whip Stitch Seam: fast, easy, medium strength seam. Good for most seaming needs.
- Mattress Stitch Seam: time-consuming, nearly invisible, strongest seam with minimal flexibility. Great for garment seams under the arm and at the shoulder.
- Single Crochet Seam: slightly textured and mostly invisible. Great universal seaming technique when the wrong side of work is hidden.
- Flat Slip Stitch Seam: lovely, decorative seam when worked in a complimentary or contrasting color. Ideal for blankets.
What You Need For Crochet Seaming
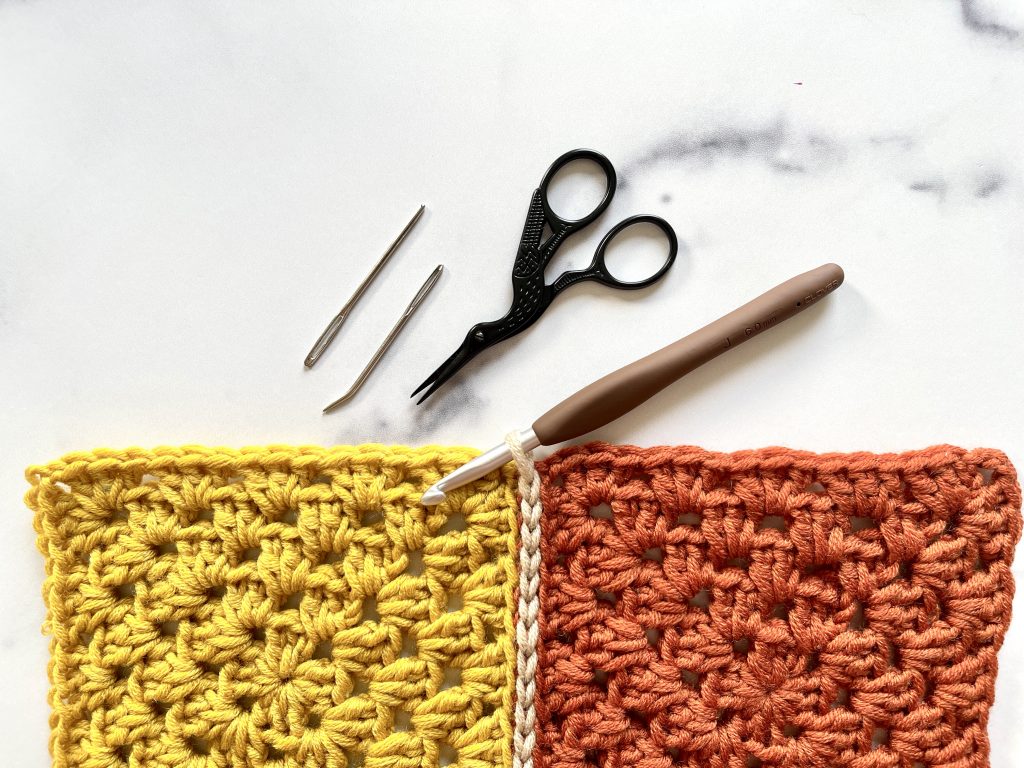
Crochet seaming uses the notions you have on hand already. Hand-sewn seams can be worked with a tapestry needle. I prefer metal, as they glide cleanly through crochet fabric and won’t split the yarn. Keep scissors handy to cut the yarn before and after completing your seam. A crochet hook is needed for stitched seams but not for hand-sewn seams. Learn more about the crochet notions & accessories all makers should have on hand HERE!
Learn Crochet Seaming Techniques
Click play on the video below to learn how to do 4 common and easy crochet seams!
Practice Crochet Seaming
Now that you know the basics of crochet seams, try them out in these beginner-friendly crochet patterns:
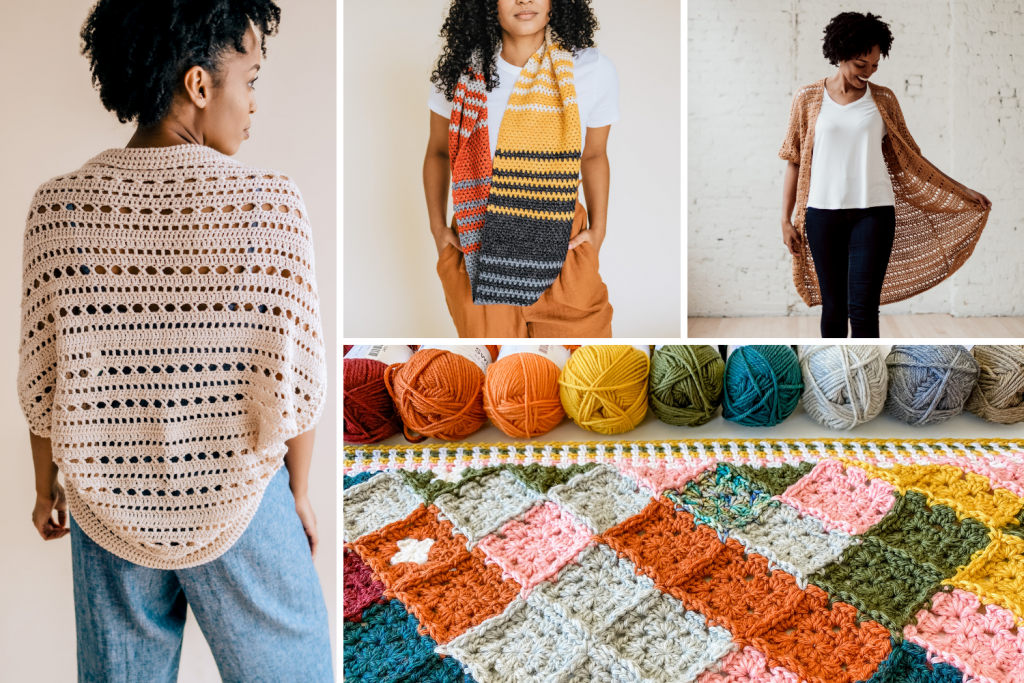
Left: Cabana Cardi
Top Middle: LoFi Cowl
Top Right: Sandbar Cardi
Bottom: Granny Square Temperature Blanket
If you’re looking for like-minded crochet fanatics, join the TLYC Makers Facebook group. We are small but mighty and we enjoy sharing our latest projects and helping each other out. Request access to this private group HERE.


