How to Increase and Decrease in Crochet

Once you have a handle on basic crochet stitches, you’re well on your way to making all of the squares and rectangles you want. But, if you want to add shaping to amigurumi, garments, and accessories, you’ll want to get comfortable with how to increase and decrease in crochet. This post shares simple increase and decrease methods for basic crochet stitches worked in rows.
This post contains affiliate links that support the content on TLYCBlog.com. All opinions are my own. Find my Privacy & Disclosures Policy here.
CLICK HERE TO PIN THIS POST
Creating shapes and curves in crochet is much simpler than it sounds. The basic concept involves adding or removing stitches as you work along a row. Adding/removing stitches allows the remaining stitches to move in different ways, accentuating the 3D nature of crochet.
Shaping in crochet can allows you to add handles to a basket, smoothly shape armholes and necklines on garments, create fun shapes to use as appliques or wall decor, and so much more. Typically, a crochet pattern will specify preferred increase and decrease methods, so pay close attention to the Notes section.
Basic Crochet Increase
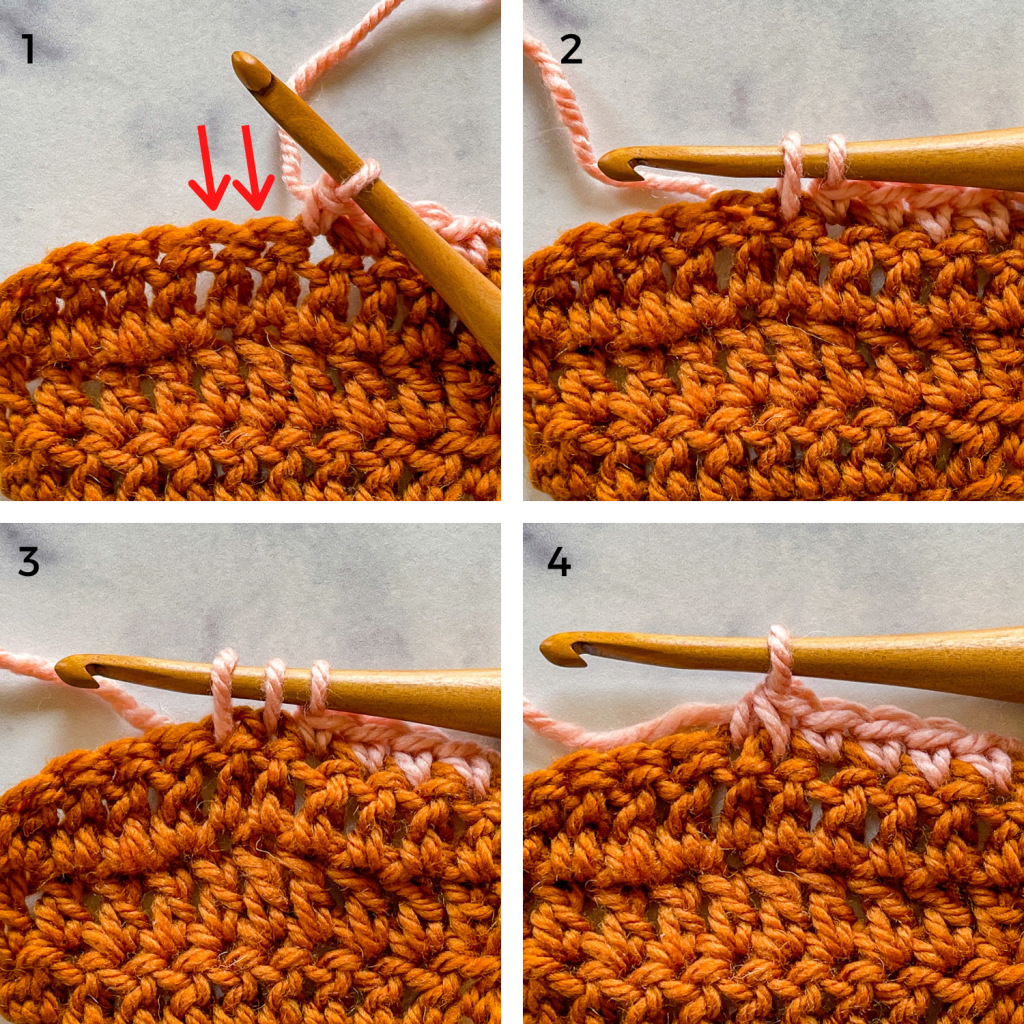
When crocheting in rows, you typically put one stitch in each stitch from the previous row. That is how you maintain the same stitch count and shape of your project. To increase, you place 2 or more stitches in the stitch from the previous row.

- 1: One double crochet stitch worked into the stitch below.
- 2: Two double crochet stitches worked into the stitch below (+1 increase made).
Where do crochet increases go in the row? Increases can be made anywhere in the row – at the very beginning, at the very end, and/or in any stitch within the row. Placing increases at the beginning/end of the row will cause the fabric to grow wider at the end where the increases are placed. Placing increases in the middle of the row will cause the fabric to bow up or out at the place of the increases.
How do you increase different stitches? My example shows how to increase with double crochet, but you can use this same technique for single crochet, half double crochet, or any stitch that is worked by placing one stitch into the stitch below. Simply place 2 of the same stitch into the stitch one row below.
Basic Crochet Decrease
Crochet decreases typically involve working two stitches together. The technique is different for each of the basic stitches but accomplishes the same thing – turning 2 stitches into 1 stitch.
Single Crochet Decrease
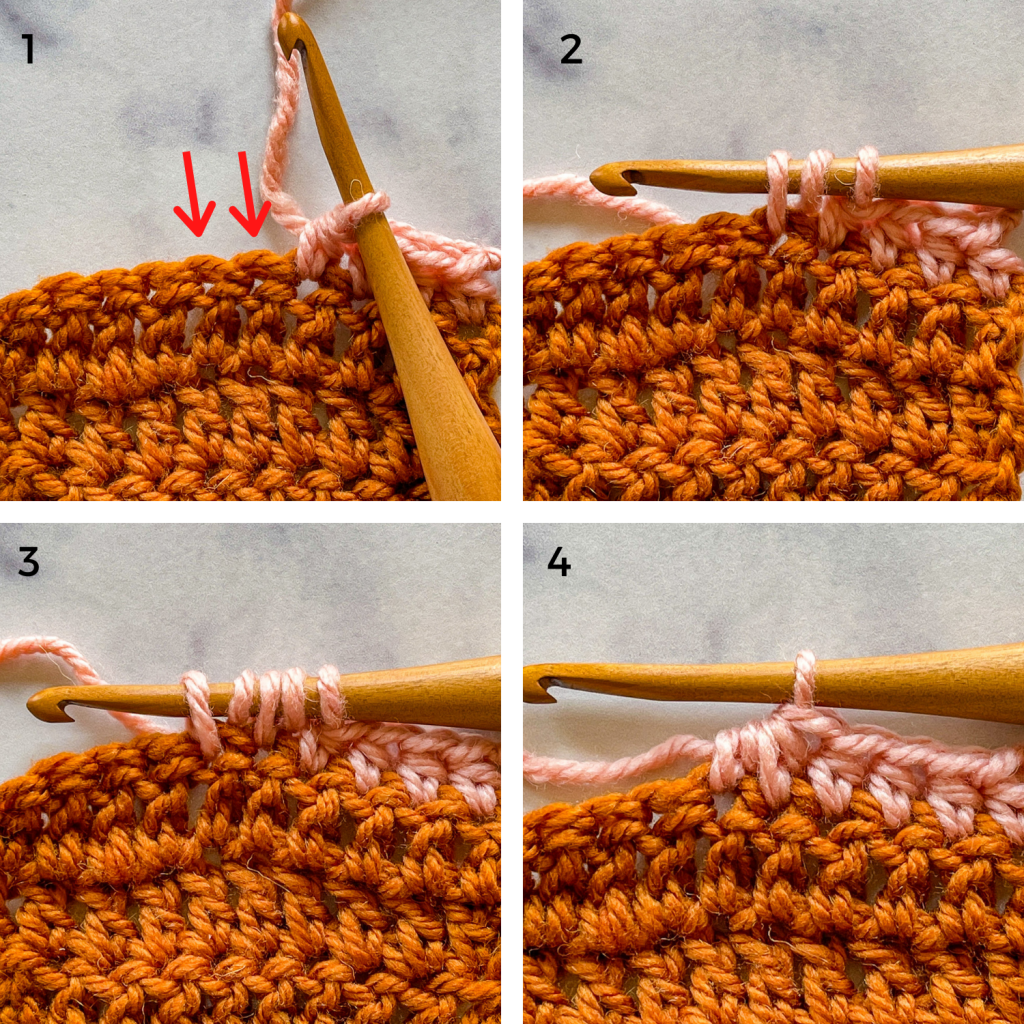
Working 2 single crochet stitches together is abbreviated as sc2tog. Here’s how you do it:
- 1: Identify the 2 stitches you want to decrease over
- 2: Pull up a loop in the first of the 2 stitches (2 loops on hook)
- 3: Pull up a loop in the second of the 2 stitches (3 loops on hook)
- 4: Yarn over and pull through all 3 loops on the hook.
Half Double Crochet Decrease
Working 2 half double crochet stitches together is abbreviated hdc2tog. Here’s how you do it:
- 1: Identify the 2 stitches you want to decrease over
- 2: Yarn over and pull up a loop in the first of the 2 stitches (3 loops on hook)
- 3: Yarn over and pull up a loop in the second of the 2 stitches (5 loops on hook)
- 4: Yarn over and pull through all 5 loops on the hook.
Double Crochet Decrease
Working 2 double crochet stitches together is abbreviated dc2tog. Here’s how you do it:
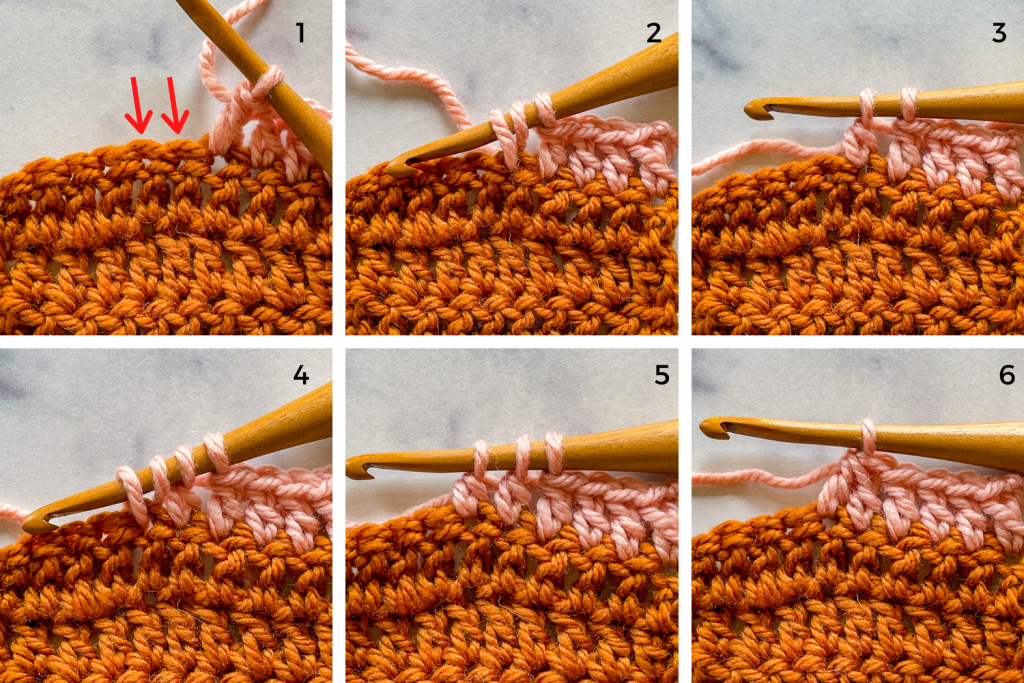
- 1: Identify the 2 stitches you want to decrease over
- 2: Yarn over and pull up a loop in the first of the 2 stitches (3 loops on hook)
- 3: Yarn over and pull through 2 loops on the hook. (2 loops on hook)
- 4: Yarn over and pull up a loop in the second of the 2 stitches (4 loops on hook)
- 5: Yarn over and pull through 2 loops on the hook. (3 loops on hook)
- 6: Yarn over and pull through all 3 loops on the hook.
Learn More About Crochet Increases and Decreases
I can’t publish this post without mentioning one of the most valuable books in my crochet library – Crochet Every Way Stitch Dictionary by Dora Ohrenstein. It is possible to increase and decrease on the edge and/or within the row of many simple and complex stitches. Dora breaks down exactly how to do it in this book, providing charts, written instructions, and stitched samples.
Not only is this book a wonderful resource for increasing and decreasing in crochet, but it’s a great way to learn new stitches. Crochet Every Way Stitch Dictionary is broken up into helpful chapters that explore different stitch types like mesh, textured stitches, lace, and more. Get your copy on Amazon and Barnes & Noble.


